Break the ice with that cute Active Directory environment over there. Automates network attacks against Active Directory to deliver you piping hot plaintext credentials when you’re inside the network but outside of the Active Directory environment. Performs 5 different network attacks for plaintext credentials as well as hashes. Autocracks hashes found with JohnTheRipper and the top 10 million most common passwords.
- RID cycling
- Uses Nmap to find NULL SMB sessions
- Performs asynchronous RID cycling to find valid usernames
- Performs a 2 password reverse bruteforce of found usernames
- Passwords tested: P@ssw0rd and <season><year>, e.g., Winter2018
- SCF file upload
- Uses Nmap to find anonymously writeable shares on the network
- Writes an SCF file to the share with a file icon that points to your machine
- When a user opens the share in Explorer their hash is sent to you
- Autocracks the hash with john and top 10 million password list
- LLMNR/NBTNS/mDNS poisoning
- Uses Responder.py to poison the layer 2 network and capture user hashes
- Autocracks the hash with john and top 10 million password list
- SMB relay
- Uses ntlmrelay.py and Responder.py to relay SMB hashes
- After a successful relay it will do the following on the victim machine:
- Add an administrative user – icebreaker:P@ssword123456
- Run an obfuscated and AMSI bypassing version of Mimikatz and parse the output for hashes and passwords
- IPv6 DNS poison
- Uses mitm6 and ntlmrelayx.py to poison IPv6 DNS and capture user and machine hashes
- Creates fake WPAD server with authentication
- Note: this can easily cause network connectivity issues for users so use sparingly
How It Works
It will perform these 5 attacks in order. RID cycling and SCF file uploads usually go fast, then it lingers on attack 3, Repsonder.py, for 10 min by default. After that amount of time, or the user-specified amount of time has passed, it will move on to the final two attacks which are run in parallel. If an SCF file was successfully uploaded and a user visits that file share in Explorer, that hash will be caught by either Responder if the hash is sent while attack 3 is running or the hash will be caught by ntlmrelayx if attacks 4 and 5 are running.
Once ntlmrelayx relays a captured hash, it will run a base64-encoded powershell command that first adds an administrative user (icebreaker:P@ssword123456) then runs an obfuscated and AMSI-bypassing version of Mimikatz. This mimikatz output is parsed and delivered to the user in the standard output as well as in the found-passwords.txt document.
All that’s left is pipe those credentials into DeathStar and BAM you went from being a lonely outsider leering at the party going on in that Active Directory domain to being tha goddamn domain admin.
Installation
Note to Kali users: you will need to run ‘apt-get remove python-impacket’ before running the setup script
sudo ./setup.sh
sudo pipenv shell
Usage
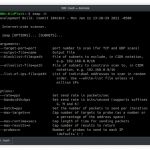
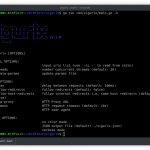
Read from a newline separated list of IP addresses and instead of having ntlmrelayx add a user and mimikatz the victim upon hash relay, have it execute a custom command on the victim machine.
sudo ./icebreaker -l targets.txt -c "net user /add User1 P@ssw0rd"Read from Nmap XML file, tell Responder to use the eth0 interface rather than the default gateway interface
sudo ./icebreaker -x nmapscan.xml -i eth0Skip all five attacks and don’t autocrack hashes
sudo ./icebreaker.py -x nmapscan.xml -s rid,scf,llmnr,ntlmrelay,dns,crackRun attack 3, LLMNR poisoning, for 30 minutes before moving on to attack 4, SMB relaying
sudo ./icebreaker.py -x nmapscan.xml -t 30










Add Comment