


CentOS which stands for Community Enterprise Operating System is one of the most widely used Linux distribution available for free. It powers many web servers across the globe. It is based on Red Hat Enterprise Linux (RHEL). But please note that even though it is based on RedHat Linux, it is not RedHat Linux. It is an OS with its own identity and one of the most widely used OS in the world today. If you wish to run any of your applications on cloud such as Amazon AWS or Microsoft Azure etc., CentOS will be one of the OS you can choose from.
Since these days most of the personal computers are powerful enough to run virtual machines, I recommend people to use a virtual machine to experiment with various other operating systems available in the market today. This avoids the need to clean install the new OS which is quite tedious and locks one down with one preference of the OS.
Step 1: Download CentOS ISO
https://www.centos.org/download/
Step 2: Create a new virtual machine
Open VMware Workstation. To launch the wizard to create a new virtual machine, Click on Create a New Virtual Machine or File -> New Virtual Machine. Welcome to the new Virtual Machine Wizard dialog box will open. Select typical and click on next.
Step 3- Browse to the ISO Image
Ensure that Installer disc image file (.iso) is check and click on browse to the downloaded .iso image file. Select it and click on next to continue.
Step 4- Enter virtual machine name
In this dialog box, enter the name of the virtual machine or accept the default. I normally accept the default. Location tells you where the Virtual machine files will be created. Click on Browse to select an new location. Normally, I leave it as it is.
Step 5 – Specify Disk Space
In this dialog box specify the disk space. Normally I go with the default. You can allocate more if you plan to install applications later on. Make sure that split virtual disk into multiple files check box is checked.
Step 6- Ready to create virtual machine
Now you will see ready to create virtual machine dialog box. With this the installation process will begin.
Click on Finish to start the process. At this stage, I normally provide the virtual machine more RAM and CPU. Default is 1 GB RAM and 1 CPU Core. Increase the RAM only if you have sufficient memory on your system.
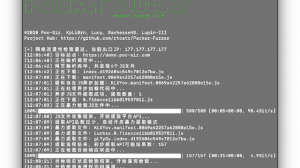
Step 7- Installation process should begin
Press “enter” in your keyboard
Step 8- Welcome to CentOS setup wizard – select language
Once the installation starts, you should see a dialog box asking you to select your language. Select the language of your choice and click on continue.
Step 9 – CentOS Setup – Installation summary
Now you should see the installation summary. If you see some grayed out area, please wait for a while
Step 10- CentOS setup – setup root password and setup user
The installation process will begin and you will be presented with a screen to configure root password
Video:


Add Comment