[sc name=”ad_1″]
What happens when you delete your files?
- Moving the file to Trash folder and then emptying the trash folder.
- Using the keyboard shortcut, Option + Command + Delete. This will delete the file immediately. If you wish to empty the trash completely, press Shift + Command + Delete.
In both these processes, we assume that the files are permanently deleted but in reality, they just disappear from immediate view and the space where these files were previously stored becomes free to store new data. In short, the files that were deleted are still there on the system and can be easily recovered.
How to recover your deleted files from Mac for free?
There are few ways to recover lost files from your Mac. You can restore them from Trash folder or by using Mac’s built-in Time Machine backup. In other cases, you would require a free Mac file recovery software. Let us look at some of these ways to recover your deleted files from Mac.
1) Restoring files from Trash folder
- Go to the Trash folder (usually located at the end of the dock).
- Right-Click on it and then click Open.
- Open the Trash Folder and select the file you wish to restore.
- Right-click on that file and then select Put Back option.
- Alternatively, you can just drag the file from Trash to desktop or any other location.
|
Image 1: The Trash folder on the desktop of the Mac system.
|
2) Using Time Machine feature
3) Using a Free Mac file recovery software
Stellar Data Recovery Free Edition for Mac
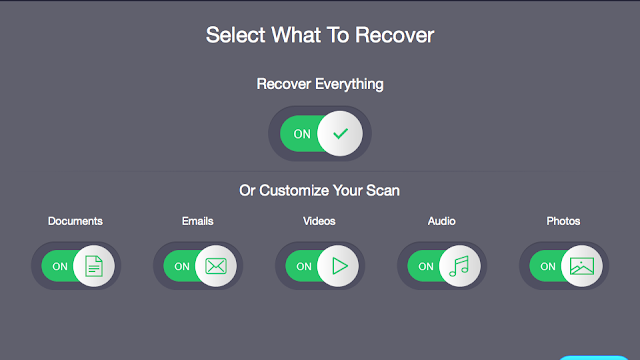
How to use Stellar Data Recovery Free Edition to restore deleted files on Mac?
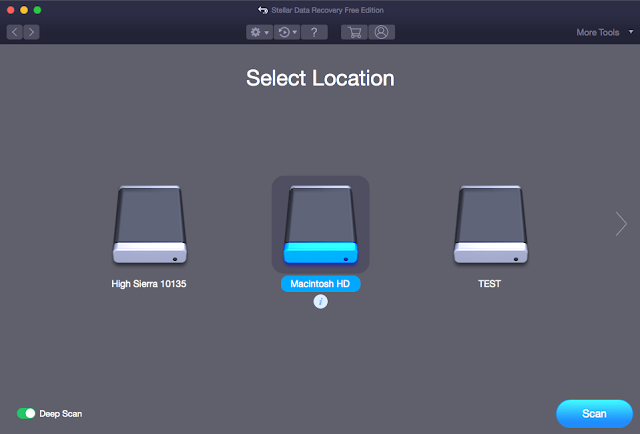
3: From the Select Location screen, please select the startup disk (Macintosh HD) to enable data recovery from the Trash folder.
For cases where you delete data from an external storage drive and then clear your Trash folder while the drive was still connected, you don’t need to select the Startup disk from Select Location screen. In such instances, you need to connect the external drive and then select the drive to perform Trash recovery.
4: Toggle on Deep Scan switch and then click on Scan. This will start the scanning process. This method is an advanced scan mode, which comprehensively scans your drive, based on the file signature. The scan time here is longer but the recovery results are quite detailed.
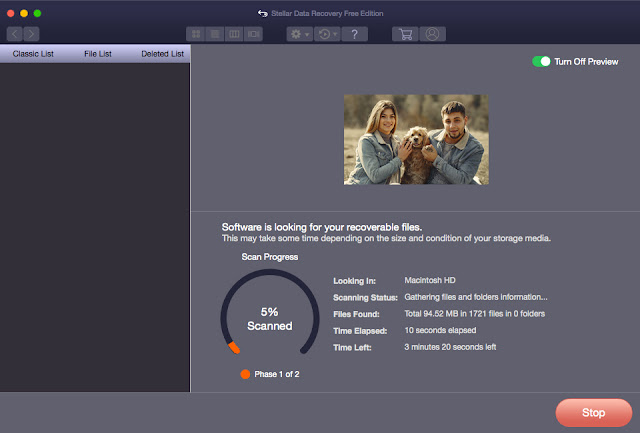 |
| Image 5: Stellar Data Recovery software scanning all recoverable data |
5: After scanning is completed, the software lists all the recoverable files present in that drive under the Classic, File, and Deleted Lists. You can select the “Deleted List” option to navigate through the folders.
 |
| Image 6: The dialog box confirming successful scan and list of items which can be recovered. |
Tip: In order to avoid rescanning, please save the scan information by using the Save Scan feature of the software. Use the Load Scan option whenever you wish to retrieve the saved scan list.
7: Click Recover after selecting the files or folders you wish to restore. While restoring, please select a different drive volume or an external storage.
 |
| Image 8: Recovery of selected file in progress |
*With the free trial version, you can scan the drive and recover up to 1 GB of the recoverable files. However, if you wish to save unlimited files, then you would need to upgrade the software to a higher version.
Summing up
Data Recovery from a free software like Stellar Data Recovery Free Edition for Mac is the only fail-safe way to restore your valuable data. The data recovery mac tool works for Mac files of all types and formats and is compatible on all Mac systems. The software has an easy-to-use interface and it also keeps a track of the health of your system measuring its temperature, performance and health. Download the software for free today and recover all your deleted files from Mac.
[sc name=”ad-in-article”]












Add Comment