


DR.CHECKER: A Soundy Vulnerability Detection Tool for Linux Kernel Drivers
Tested on
Ubuntu >= 14.04.5 LTS
1. Setup
The implementation is based on LLVM, specifically LLVM 3.8. We also need tools like c2xml to parse headers.
First, make sure that you have libxml (required for c2xml):
sudo apt-get install libxml2-devNext, We have created a single script, which downloads and builds all the required tools.
cd helper_scripts
python setup_drchecker.py --help
usage: setup_drchecker.py [-h] [-b TARGET_BRANCH] [-o OUTPUT_FOLDER]

optional arguments:
  -h, --help        show this help message and exit
  -b TARGET_BRANCH  Branch (i.e. version) of the LLVM to setup. Default:
                    release_38 e.g., release_38
  -o OUTPUT_FOLDER  Folder where everything needs to be setup.
Example:
python setup_drchecker.py -o drchecker_depsTo complete the setup you also need modifications to your local PATH environment variable. The setup script will give you exact changes you need to do.
2. Building
This depends on the successful completion of Setup. We have a single script that builds everything, you are welcome.
cd llvm_analysis
./build.sh
3. Running
This depends on the successful completion of Build. To run DR.CHECKER on kernel drivers, we need to first convert them into llvm bitcode.
3.1 Building kernel
First, we need to have a buildable kernel. Which means you should be able to compile the kernel using regular build setup. i.e., make. We first capture the output of make command, from this output we extract the exact compilation command.
3.1.1 Generating output of make (or makeout.txt)
Just pass V=1 and redirect the output to the file. Example:
make V=1 O=out ARCH=arm64 > makeout.txt 2>&1NOTE: DO NOT USE MULTIPLE PROCESSES i.e., -j. Running in multi-processing mode will mess up the output file as multiple process try to write to the output file.
That’s it. DR.CHECKER will take care from here.
3.2 Running DR.CHECKER analysis
There are several steps to run DR.CHECKER analysis, all these steps are wrapped in a single script helper_scripts/runner_scripts/run_all.py How to run:
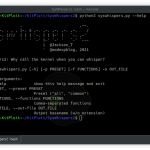
python run_all.py --help
usage: run_all.py [-h] [-l LLVM_BC_OUT] [-a CHIPSET_NUM] [-m MAKEOUT] [-g COMPILER_NAME] [-n ARCH_NUM] [-o OUT] [-k KERNEL_SRC_DIR] [-skb] [-skl] [-skp] [-ske] [-ski] [-f SOUNDY_ANALYSIS_OUT]

optional arguments:
  -h, --help            show this help message and exit
  -l LLVM_BC_OUT        Destination directory where all the generated bitcode files should be stored.
  -a CHIPSET_NUM        Chipset number. Valid chipset numbers are:
                        1(mediatek)|2(qualcomm)|3(huawei)|4(samsung)
  -m MAKEOUT            Path to the makeout.txt file.
  -g COMPILER_NAME      Name of the compiler used in the makeout.txt, This is
                        needed to filter out compilation commands. Ex: aarch64-linux-android-gcc
  -n ARCH_NUM           Destination architecture, 32 bit (1) or 64 bit (2).
  -o OUT                Path to the out folder. This is the folder, which
                        could be used as output directory during compiling
                        some kernels. (Note: Not all kernels needs a separate out folder)
  -k KERNEL_SRC_DIR     Base directory of the kernel sources.
  -skb                  Skip LLVM Build (default: not skipped).
  -skl                  Skip Dr Linker (default: not skipped).
  -skp                  Skip Parsing Headers (default: not skipped).
  -ske                  Skip Entry point identification (default: not
                        skipped).
  -ski                  Skip Soundy Analysis (default: not skipped).
  -f SOUNDY_ANALYSIS_OUT    Path to the output folder where the soundy analysis output should be stored.
The script builds, links and runs DR.CHECKER on all the drivers, as such might take considerable time(45 min-90 min). If you want to run DR.CHECKER manually on individual drivers, refer standalone
The above script performs following tasks in a multiprocessor mode to make use of all CPU cores:
3.2.1. LLVM Build
- Enabled by default.
All the bitcode files generated will be placed in the folder provided to the argument -l. This step takes considerable time, depending on the number of cores you have. So, if you had already done this step, You can skip this step by passing -skb.
3.2.2. Linking all driver bitcode files in s consolidated bitcode file.
- Enabled by default
This performs linking, it goes through all the bitcode files and identifies the related bitcode files that need to be linked and links them (using llvm-link) in to a consolidated bitcode file (which will be stored along side corresponding bitcode file).
Similar to the above step, you can skip this step by passing -skl.
3.2.3.Parsing headers to identify entry function fields.
- Enabled by default.
This step looks for the entry point declarations in the header files and stores their configuration in the file: hdr_file_config.txt under LLVM build directory.
To skip: -skp
3.2.4.Identify entry points in all the consolidated bitcode files.
- Enabled by default
This step identifies all the entry points across all the driver consolidated bitcode files. The output will be stored in file: entry_point_out.txt under LLVM build directory.
Example of contents in the file entry_point_out.txt:
FileRead:hidraw_read:/home/drchecker/33.2.A.3.123/llvm_bc_out/drivers/hid/llvm_link_final/final_to_check.bc
FileWrite:hidraw_write:/home/drchecker/33.2.A.3.123/llvm_bc_out/drivers/hid/llvm_link_final/final_to_check.bc
IOCTL:hidraw_ioctl:/home/drchecker/33.2.A.3.123/llvm_bc_out/drivers/hid/llvm_link_final/final_to_check.bc
To skip: -ske
3.2.5.Run Soundy Analysis on all the identified entry points.
- Enabled by default.
This step will run DR.CHECKER on all the entry points in the file entry_point_out.txt. The output for each entry point will be stored in the folder provided for option -f.
To skip: -ski
3.2.6 Example:
Now, we will show an example from the point where you have kernel sources to the point of getting vulnerability warnings.
We have uploaded a mediatek kernel 33.2.A.3.123.tar.bz2. First download and extract the above file.
Lets say you extracted the above file in a folder called: ~/mediatek_kernel
3.2.6.1 Building
cd ~/mediatek_kernel
source ./env.sh
cd kernel-3.18
# the following step may not be needed depending on the kernel
mkdir out
make O=out ARCH=arm64 tubads_defconfig
# this following command copies all the compilation commands to makeout.txt
make V=1 -j8 O=out ARCH=arm64 > makeout.txt 2>&1
3.2.6.2 Running DR.CHECKER
cd <repo_path>/helper_scripts/runner_scripts

python run_all.py -l ~/mediatek_kernel/llvm_bitcode_out -a 1 -m ~/mediatek_kernel/kernel-3.18/makeout.txt -g aarch64-linux-android-gcc -n 2 -o ~/mediatek_kernel/kernel-3.18/out -k ~/mediatek_kernel/kernel-3.18 -f ~/mediatek_kernel/dr_checker_out
The above command takes quite some time (30 min – 1hr).
3.2.6.3 Understanding the output
First, all the analysis results will be in the folder: ~/mediatek_kernel/dr_checker_out (argument given to the option -f), for each entry point a .json file will be created which contains all the warnings in JSON format. These json files contain warnings organized by contexts.
Second, The folder ~/mediatek_kernel/dr_checker_out/instr_warnings (w.r.t argument given to the option -f) contains warnings organized by instruction location.
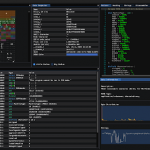
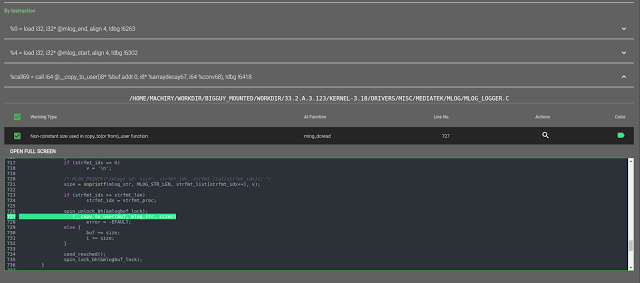
These warnings could be analyzed using our Visualizer.
Finally, a summary of all the warnings for each entry point organized by the type will be written to the output CSV file: ~/mediatek_kernel/dr_checker_out/warnings_stats.csv (w.r.t argument given to the option -f).
3.2.7 Things to note:
3.2.7.1 Value for option -g
To provide value for option -g you need to know the name of the *-gcc binary used to compile the kernel. An easy way to know this would be to grep for gcc in makeout.txt and you will see compiler commands from which you can know the *-gcc binary name.
For our example above, if you do grep gcc makeout.txt for the example build, you will see lot of lines like below:
aarch64-linux-android-gcc -Wp,-MD,fs/jbd2/.transaction.o.d -nostdinc -isystem ...So, the value for -g should be aarch64-linux-android-gcc.
If the kernel to be built is 32-bit then the binary most likely will be arm-eabi-gcc
3.2.7.2 Value for option -a
Depeding on the chipset type, you need to provide corresponding number.
3.2.7.3 Value for option -o
This is the path of the folder provided to the option O= for make command during kernel build.
Not all kernels need a separate out path. You may build kernel by not providing an option O, in which case you SHOULD NOT provide value for that option while running run_all.py.
3.3 Visualizing DR.CHECKER results ❄️
We provide a web-based UI to view all the warnings. Please refer Visualization.
3.6 Disabling Vulnerability checkers
You can disable one or more vulnerability checkers by uncommenting the corresponding #define DISABLE_* lines in BugDetectorDriver.cpp
3.5 Post-processing DR.CHECKER results
To your liking, we also provide a script to post-process the results. Check it out.
Have fun!!


Add Comment